
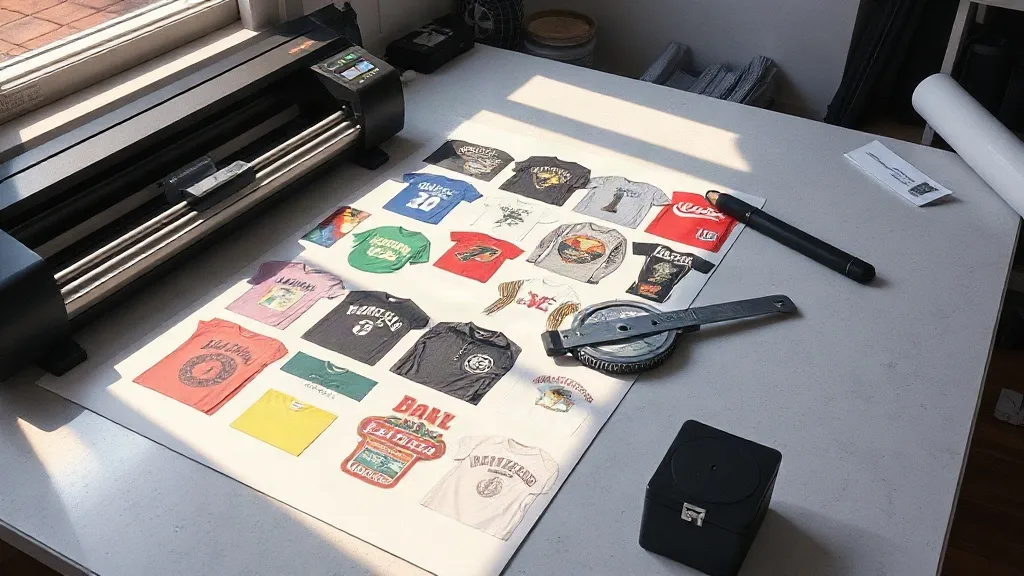
Every DTF transfer you press starts as a file on someone's screen, and that file is where your profit margin is quietly won or lost. Most shops focus on ink, powder, and press settings, but the layout on a DTF Gangsheet often determines whether a job is profitable or just busywork. If you have ever opened a gangsheet file and seen a half-empty film with artwork scattered like confetti, you already know the problem.
This guide is not about what a gangsheet is. It is about how to build one that respects your material budget, your press operator's time, and your customer's deadline. The tactics below come from the daily reality of small and mid-size print shops that live and die by transfer cost per unit.
Why Gangsheet Layout Deserves Its Own Workflow
Most transfer suppliers charge by the sheet or by the linear foot of film, not by the number of designs you squeeze onto it. That means the empty space on your gangsheet is not free. It is paid-for real estate you are choosing not to use. A layout that leaves 30 percent of the film blank is effectively a 30 percent surcharge on every print in that run.
The fix is not complicated, but it does require treating layout as a deliberate step rather than an afterthought. In shops that have tightened this process, the same monthly film spend typically yields noticeably more transfers, and the press team spends less time cutting around awkward gaps.
Start With the Order Mix, Not the Artwork
The instinct is to open the design files and start dragging them around. A better first move is to look at the order mix as a whole. Ask three questions before placing a single element:
- How many distinct designs are in this run, and what sizes do they need?
- Which designs repeat, and which appear only once?
- What is the smallest and largest print dimension in the batch?
Answers to those questions tell you whether the gangsheet should be organized by design, by size, or by customer. A run of ten small left-chest logos and two large back prints needs a very different arrangement than a run of forty identical 10-inch fronts. Grouping similar sizes together reduces the odd gaps that appear when you alternate between tiny and huge elements.
Nesting Techniques That Actually Save Film
Nesting is the practice of fitting irregular shapes together so they share edges and negative space. On a DTF gangsheet, a few simple habits do most of the work:
Rotate Before You Resize
A tall, narrow design can often be rotated 90 degrees to slot into a horizontal gap that would otherwise be wasted. Rotating does not change the print dimensions, so there is no quality trade-off. Resizing, on the other hand, changes the customer's approved artwork and should be a last resort, not a first move.
Use the Gaps Between Large Prints
Large back prints leave generous margins around them. Those margins are perfect for small chest logos, sleeve hits, or tag designs. Placing small elements in the valleys between big ones is the single easiest way to raise film utilization without touching the layout of the main artwork.
Keep a Consistent Gutter
Overpacking is a real risk. If prints sit too close together, the cutting step becomes slow and error-prone, and a slip of the blade can ruin two transfers at once. A consistent gutter of roughly a quarter inch between elements gives the cutter room to work and keeps the sheet readable at a glance. The exact number depends on your cutter and your comfort level, but consistency matters more than the specific measurement.
Color and Ink Load: The Hidden Cost Driver
Layout is not only about geometry. Ink coverage affects film cost, powder consumption, and even press time. A gangsheet packed with full-bleed, dark, heavily saturated designs uses far more ink and adhesive powder than one dominated by lighter artwork. When you can, mix heavy-coverage and light-coverage designs on the same sheet so the average ink load stays reasonable and your powder application stays even.
There is also a practical limit to how much ink a single sheet should carry. Overloaded sheets can show curing inconsistencies, especially near the edges, and the powder can clump where coverage is densest. Spreading dense designs across multiple sheets is often cheaper in the long run than trying to max out one.
Matching Gangsheet Size to Your Press and Cutter
A perfectly nested gangsheet is useless if it does not fit your equipment. Before you finalize a layout, confirm the printable width of your film, the maximum sheet length your cutter handles comfortably, and the platen size on your heat press. Shops that ignore these constraints end up trimming sheets by hand, which adds labor and invites mistakes.
For most small shops, a sheet that fits the cutter with a little margin and matches the press platen is the sweet spot. Longer sheets can improve film utilization, but only if the cutting and pressing workflow can absorb them without slowing down.
Version Control and File Naming
Gangsheet files multiply quickly. A single order can generate several revisions as artwork changes and quantities shift. Without a naming convention, the press operator ends up guessing which file is current, and reprints from the wrong version are an expensive way to learn the lesson.
A simple convention such as client name, date, and revision number keeps everyone aligned. Storing the final approved file in a shared folder and marking older versions as archived prevents the classic mistake of printing from a superseded layout that still has a customer's rejected design on it.
When to Split a Gangsheet
Bigger is not always better. Splitting a run into two sheets can be the smarter choice when:
- One design has a tight deadline and should not wait for the rest of the batch.
- The sheet would exceed your cutter's comfortable length.
- Ink coverage is so heavy that curing becomes unreliable.
- A single customer's artwork is still in revision and should not block the others.
Treat the gangsheet as a scheduling tool as much as a cost-saving one. Sometimes paying slightly more film is cheaper than missing a ship date.
A Quick Layout Checklist Before You Send the File
- Confirm every design's final size against the customer's approved proof.
- Check that all elements fit within the printable width of your film.
- Verify gutters are consistent and wide enough for clean cutting.
- Balance heavy and light ink coverage across the sheet.
- Confirm the sheet length is compatible with your cutter and press platen.
- Name the file with client, date, and revision, then archive older versions.
Running this list takes a couple of minutes and catches most of the errors that lead to wasted film, reprints, and missed deadlines.
Frequently Asked Questions
How much empty space on a DTF gangsheet is acceptable?
There is no universal number, but many shops aim to keep unused film below roughly 15 percent. Beyond that, the cost of the wasted area starts to show up clearly in per-transfer pricing, and it is usually worth reworking the layout.
Can I mix different customers' designs on one gangsheet?
Yes, and many shops do it to improve film utilization. The key is to keep the file organized by customer and to make sure each design is clearly labeled so the cutting and packing steps do not mix up orders.
Does rotating a design on a gangsheet affect print quality?
Rotating does not change the print resolution or the transfer itself. It only changes how the element sits on the film. As long as the design stays within the printable area and the gutters are respected, rotation is a safe layout tool.
What is the best gangsheet size for a small print shop?
It depends on your cutter and press platen. A practical approach is to choose a sheet length that your cutter handles without strain and that fits your press platen with a small margin. Longer sheets can save film, but only if your workflow can keep up.
How often should I review my gangsheet layouts?
A quick review after every large batch is a good habit. If you notice recurring empty areas, repeated cutting problems, or ink coverage issues, it is a sign the layout process needs a small adjustment before the next run.